


Stable Diffusion入门(十二):制作会说话图片 | SadTalker


在一些视频网站上我们经常会看到一些美丽的数字人小姐姐在播报内容,那么他们是如何做到的呢?
今天我们就要看下Stable Diffusion的一个插件SadTalker,通过它,我们就能实现只要提供一张图片和声音,就能实现一个会说话的图像了
1. 安装插件
首先,我们到「扩展插件」页面进行插件的安装。插件地址是: https://github.com/Winfredy/SadTalker

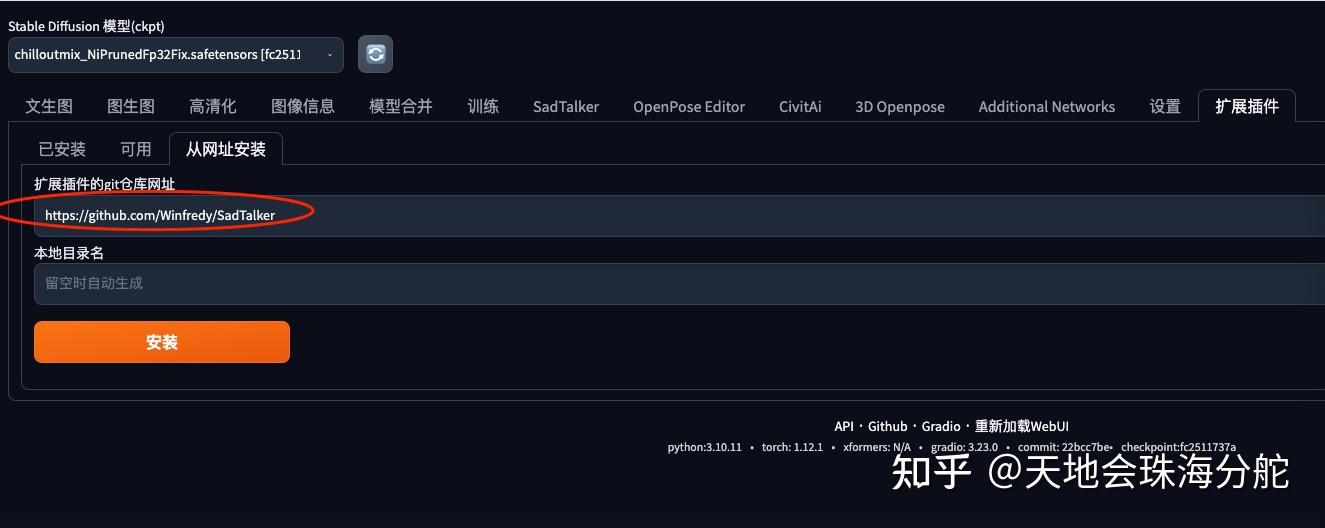
按安装的过程中需要注意的是,因为要安装的东西比较多,所以你可能需要等一段时间才会显示安装完成,不要以为它没有安装。你可以去后台看下安装进度
安装完成后请到控制台重启下我们的Stable Diffusio
2. 手动下载SadTalker的模型文件(可选)
重启过程中,请看下控制台输出是否有以下信息
SadTalker will not support download all the files from hugging face, which will take a long time.
please manually set the SADTALKER_CHECKPOINTS in `webui_user.bat`(windows) or `webui_user.sh`(linux)


如果没有看到的,请跳过这一节。
如果看到这一点的,请在控制台进入到
cd extensions/SadTalker然后执行以下两条命令
chmod 755 scripts/download_models.sh
/scripts/download_models.sh
然后后台就会看到下载进度条
等下载完成后,我们再次重启我们的Stable Diffusion WebUI,这时应该不会再出现上面的提示
这时我们打开我们的WebUI,应该能看到SadTalker这个标签,然后我们可以尝试上传个人脸清晰的图片和一个语音文件,然后点击生成


然后请看下你的后台,如果没有任何报错的,那你就等着出结果就好了
3. 修改代码(可选,cpu版本)
如果你的stable diffusion是安装在不支持的GPU的设备上,也就是CPU版本,那么你有可能会出现以下错误
RuntimeError: Attempting to deserialize object on a CUDA device but torch.cuda.is_available() is False. If you are running on a CPU-only machine, please use torch.load with map_location=torch.device('cpu') to map your storages to the CPU.
这时你需要修改个文件,不同设备上安装的库也许会不一样,比如我这里需要修改这个文件
venv/lib/python3.10/site-packages/facexlib/alignment/__init__.py
import torch
from facexlib.utils import load_file_from_url
from .awing_arch import FAN
from .convert_98_to_68_landmarks import landmark_98_to_68
__all__ = ['FAN', 'landmark_98_to_68']
def init_alignment_model(model_name, half=False, device='cuda', model_rootpath=None):
 if model_name == 'awing_fan':
 model = FAN(num_modules=4, num_landmarks=98, device=device)
 model_url = 'https://github.com/xinntao/facexlib/releases/download/v0.1.0/alignment_WFLW_4HG.pth'
 else:
 raise NotImplementedError(f'{model_name} is not implemented.')